Alumni Registration Guide

  1. Using the email invitation or the unique link you were sent navigate to Quinncia
  2. Enter the same email address used for the original email from Quinn and click CONTINUE *Please note your school email address will not work. Please use your personal/professional email.

Quinncia sign-in page features a white login form on a blue background. The form includes an email input field, a “CONTINUE WITH EMAIL” button, and guidance for advisors and students on account setup. Icons indicate security and required fields.

  1. An email validation code will be sent to the email address you signed up with. Input the code from your email to continue.

Quinncia sign-up page displays a green notification bar confirming that a confirmation email was sent. Below, a white form includes two sections: one for entering an email address and another for pasting a sign-up code. A message explains that no account exists for the entered email and a temporary code was sent. Buttons labeled “CONTINUE” and “SEND NEW CODE IN 04:55” appear below the code input field.

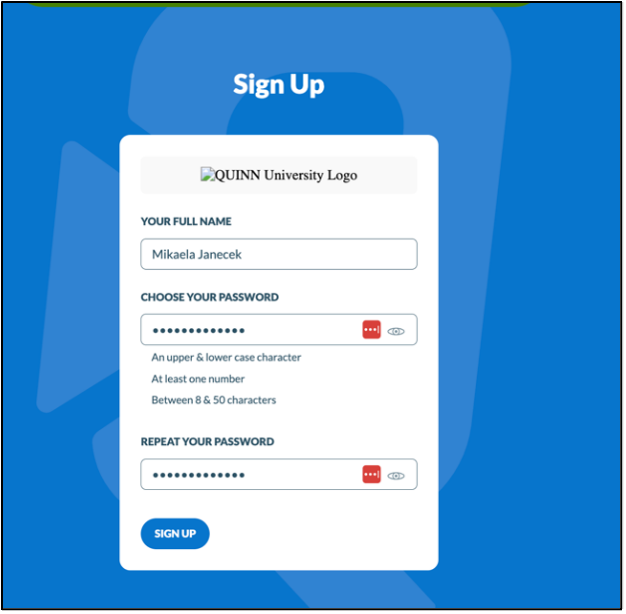
  1. Fill out your name and create a password.

    Quinncia sign-up form for Quinn University includes input fields for full name, password, and password confirmation. Password requirements are listed: one uppercase and lowercase character, at least one number, and a length between 8–50 characters. Both password fields show error icons and visibility toggles. A “SIGN UP” button appears at the bottom.

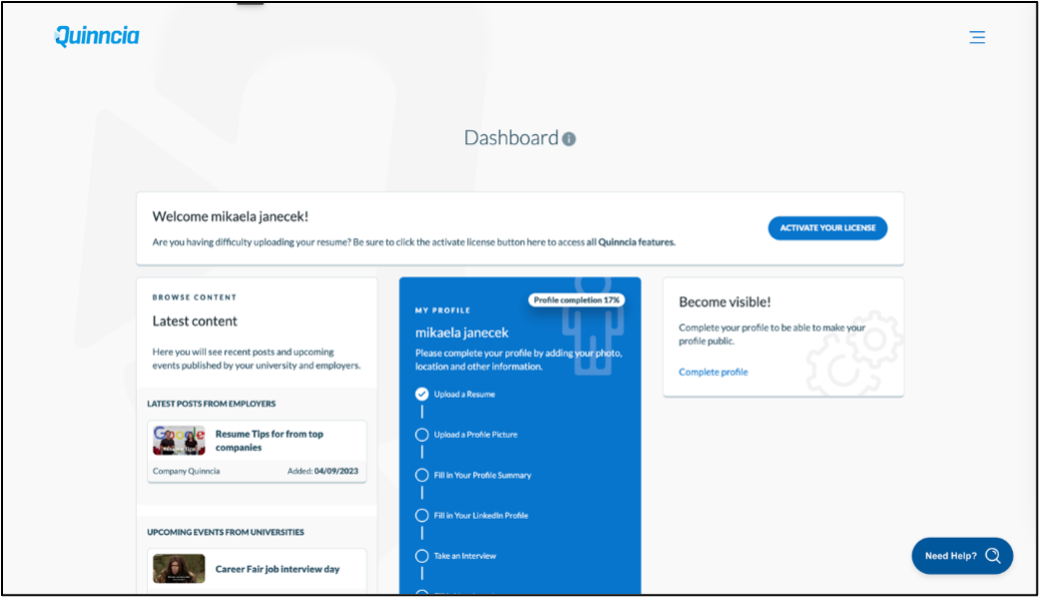
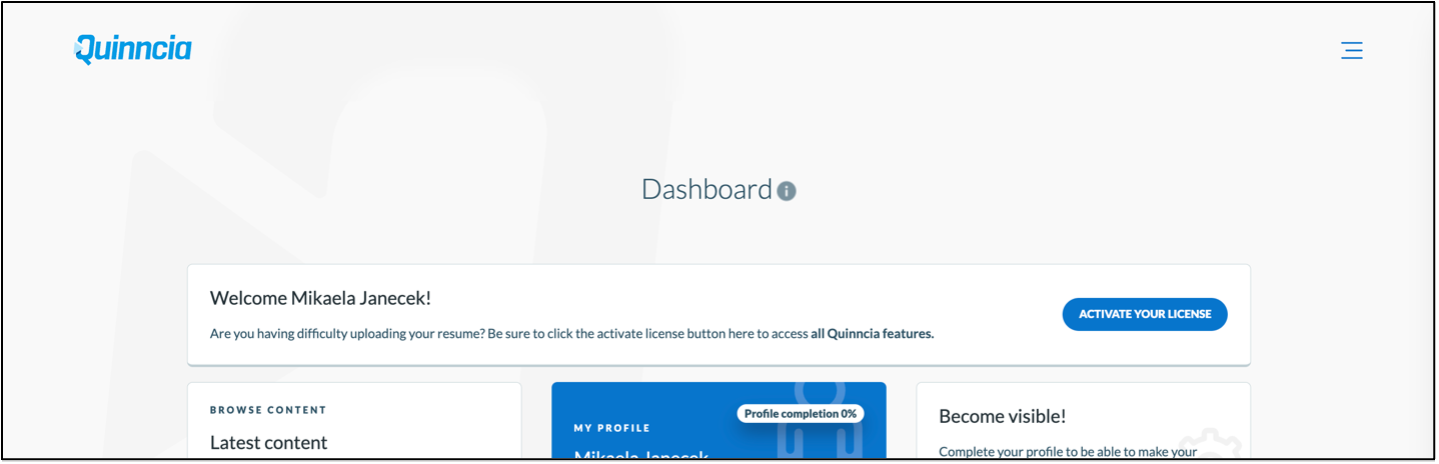
  2. Once logged in, the Quinncia dashboard will appear.

Quinncia dashboard displays a welcome message prompting the user to activate their license to access all features. A green “ACTIVATE YOUR LICENSE” button appears below. The “Latest content” section includes a resume tips post and a career fair event. A profile completion tracker shows 17% progress with tasks like uploading a resume, profile picture, summary, LinkedIn profile, and taking an interview. A “Become visible!” section encourages profile completion. A “Need Help?” button is located in the bottom right corner.

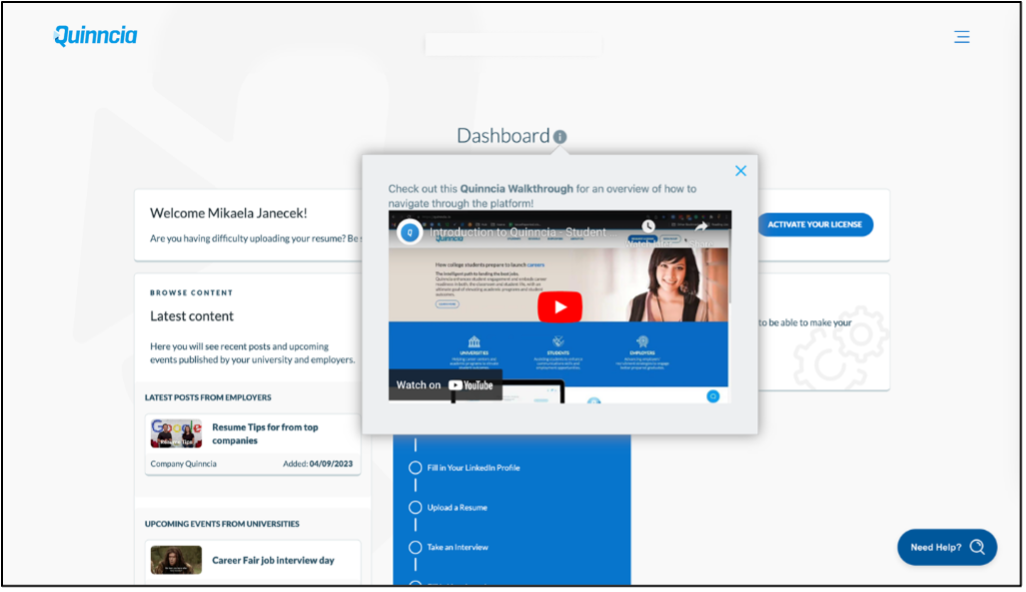
*A helpful, brief video will pop up, please watch for help navigating Quinncia

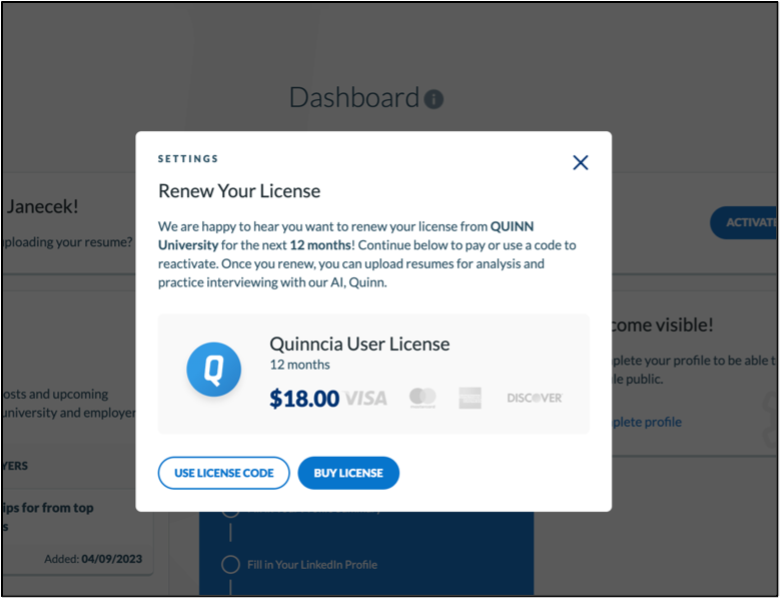
  1. Click the blue ACTIVATE YOUR LICENSE button on your dashboard

Quinncia dashboard displays a welcome message prompting the user to activate their license to access all features. A green “ACTIVATE YOUR LICENSE” button appears below. The “Latest content” section is visible, along with a sidebar showing profile completion at 0%. A “Become visible!” prompt encourages users to complete their profile. Navigation options include “Dashboard,” “Browse Content,” and “My Profile.

  1. You will be prompted to purchase your Quinncia access. If you were emailed a code to use, click ‘USE LICENSE CODE’. If you are purchasing for the first time click ‘BUY LICENSE CODE’.

*Please note price differs by university.

Quinncia dashboard displays a pop-up titled “Renew Your License.” The message confirms renewal for 12 months at $18.00 and outlines benefits like resume analysis and AI interview practice. Payment options include Visa, Mastercard, American Express, and Discover. Two buttons at the bottom read “USE LICENSE CODE” and “BUY LICENSE.”

  1. When you click ‘BUY LICENSE’, you will be prompted to enter your card information.

Quinncia payment page for purchasing a user license shows two sections. On the left, purchase details include item name, price, subtotal, tax prompt, and total due. On the right, a form collects email, card information, name on card, billing address, and optional phone number. A “Pay” button appears at the bottom. Total cost is $18.00.

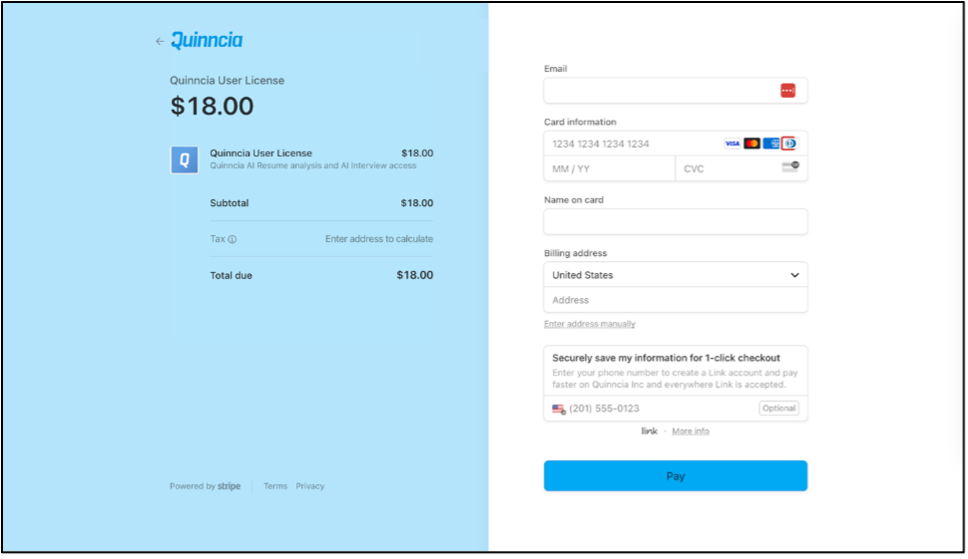
  1. After you enter your card information and click Pay, you will be sent back to the dashboard page where you can start uploading resumes and scheduling mock interviews!

Quinncia dashboard displays four main sections. Top left: “Download Resume Template” with a dropdown labeled “SELECT TEMPLATE” and a “Download” button. Top right: “Your Resume” shows a score of 234 with a silver badge and a graph tracking progress from 211 to 234. Buttons below read “SEE DETAILS” and “UPLOAD NEW.” Bottom left: “Latest content” includes employer posts and university events. Bottom right: “My Profile” shows 17% completion with prompts to upload a resume and profile picture.

If you have any issues or questions, please reach out to support@quinncia.io for prompt assistance!

Still need help? Contact Us Contact Us